

Need to make changes to a group of applicants all at once? You're in the right place. Whether you're updating statuses, adding tags, jotting down notes, or moving folks to another job, Pipeline View is your command center for batch changes.
Step 1: Find the applicants you want
You can work with applicants across your whole account, or narrow things down to a single job:
- All applicants:
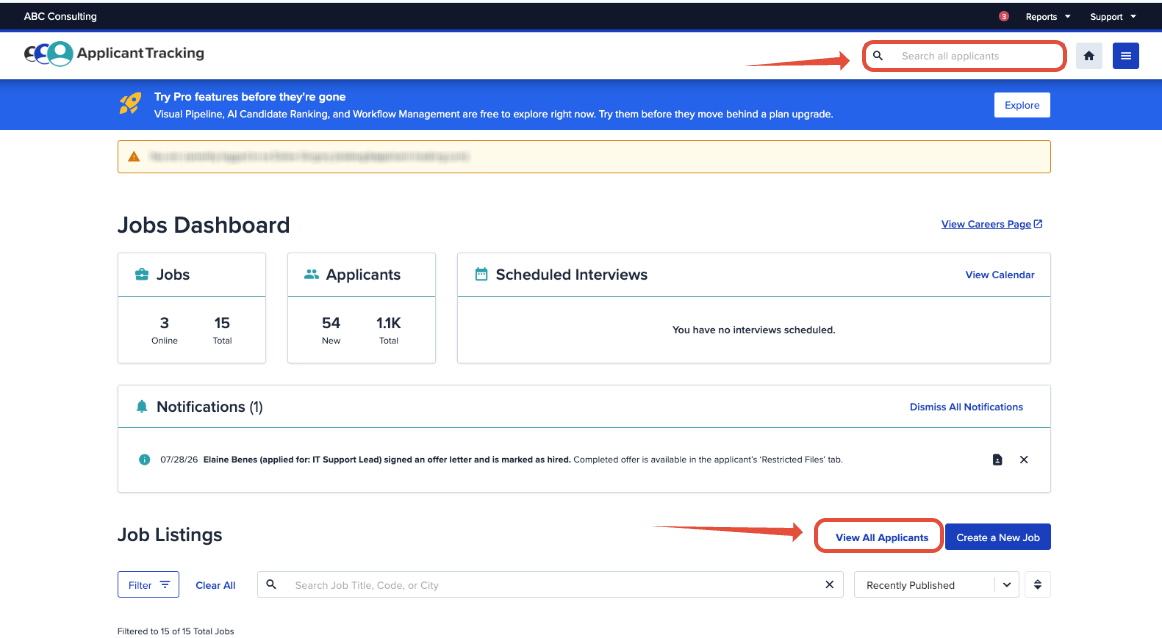
- Click into the search bar in the upper-right corner and hit Enter without typing anything. This pulls up every applicant in your account.
- Or, just select View All Applicants from your Job Grid
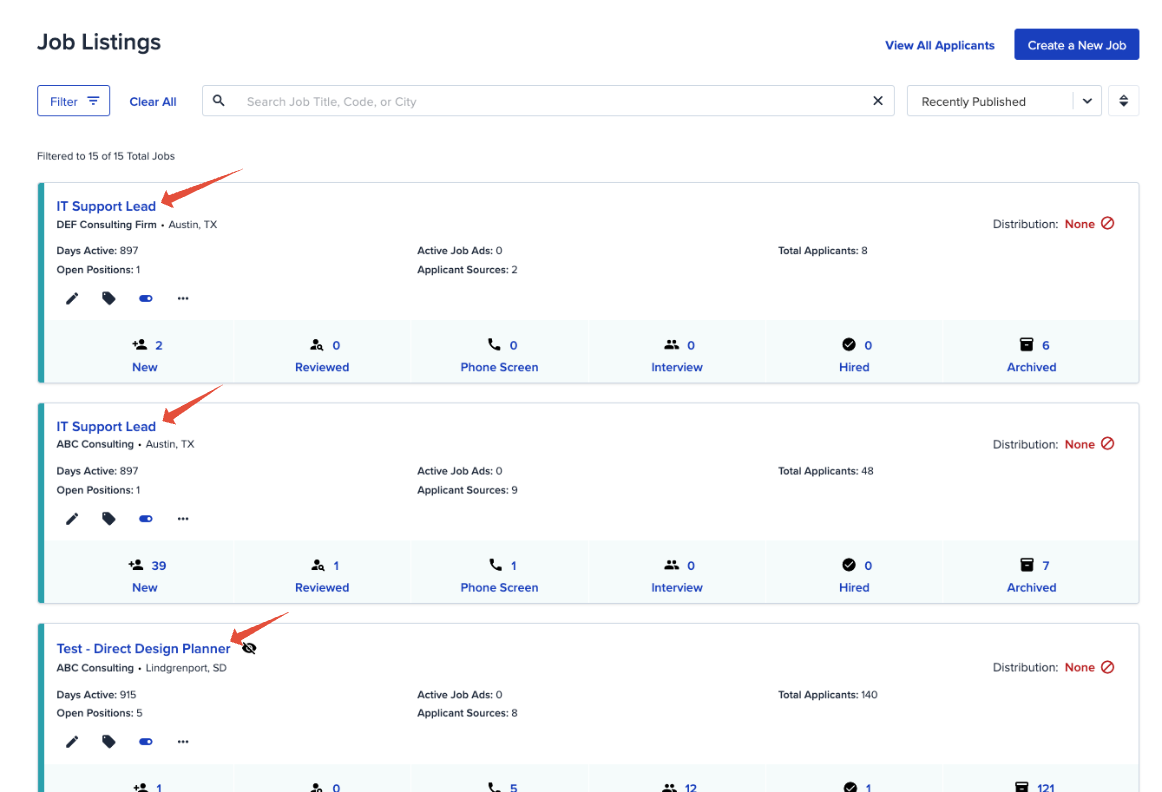
- One job's applicants: Click the job title from your main Dashboard to jump straight into that job's applicant list.
Step 2: Filter and sort in on the right group
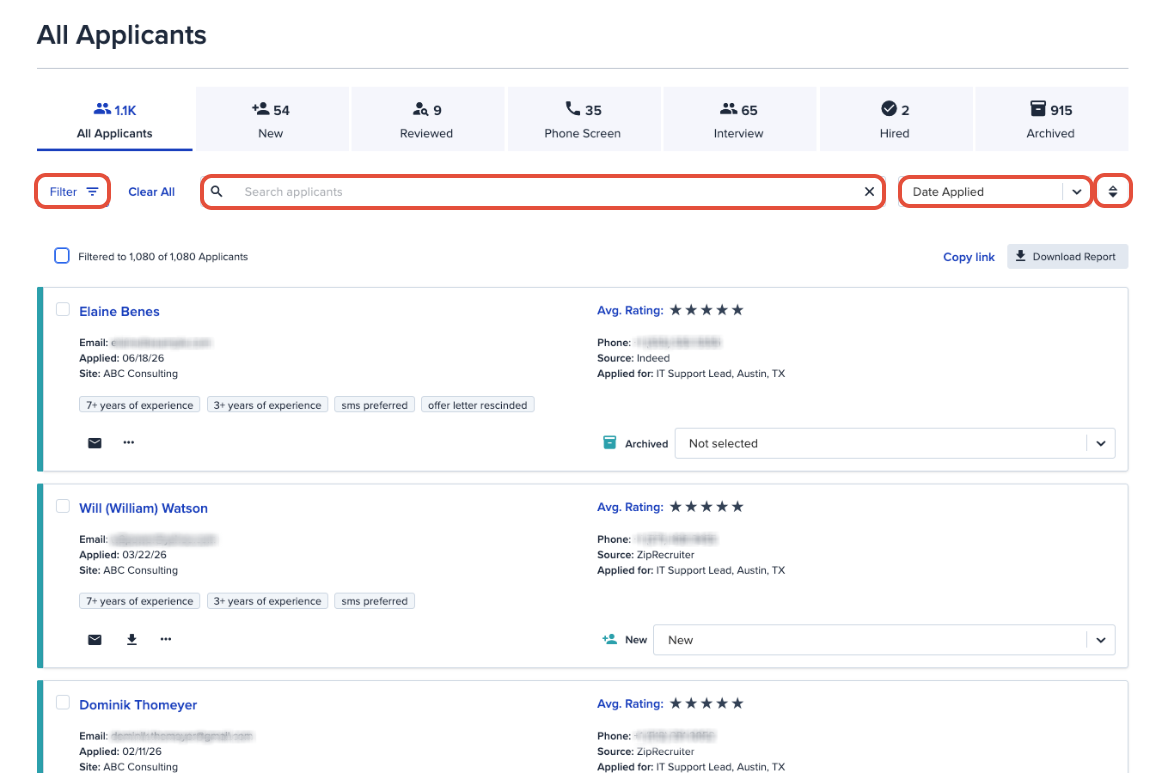
Once you're looking at the applicants you want, the Filter Drawer helps you narrow things down further. You can filter by:
- Site (select up to 10)
- Job (select up to 10)
- Pipeline Stage
- Tag (select up to 10)
- Source (select up to 10)
- Rating
- AI Ranking (%)
- Applied After / Applied Before
- Hired After / Hired Before
Want to get even more specific? Use the search bar to add keywords on top of your filters, then use the Sort Order options to organize what you're seeing. You can sort by:
- Date Applied
- Rating
- AI Ranking
And toggle between Ascending or Descending order, whichever helps you scan the list faster.
Heads up: You can only bulk message or update up to 500 applicants at a time. Working with a bigger group? Just break it into smaller batches.
Step 3: Make your bulk updates
Here's how to update applicants in bulk, once you've got your group ready:
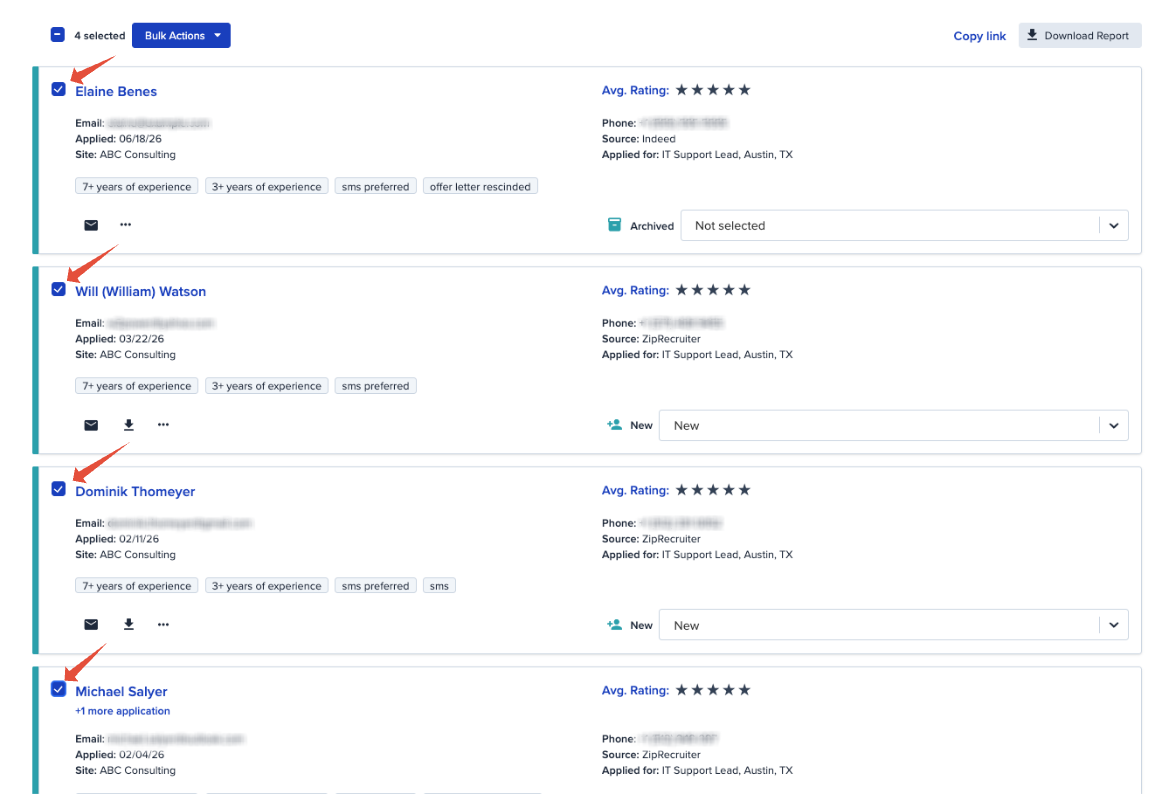
Select your applicants
- Use the filters and sort options above to find your target applicants.
- Check the boxes next to their names to select them.
- Reminder: you can select up to 500 applicants per batch.
Choose your action
- Click the "Bulk Action" button and choose your desired action:
- Send Message
- Send "Thanks but No Thanks"
- Update Applicants
If You Select: Send a Message
- If you want to Send a Message, selecting that option will bring you to a pop-up window where you can select the Template you'd like to send to them, or create a custom message.
- You can also bulk select a Status for all of these applicants
- Leave the box checked for "Notify me when applicant replies" if you want to make sure you don't miss any replies
- If you also want to update these applicants (status, rating, notes), make sure you check that box.
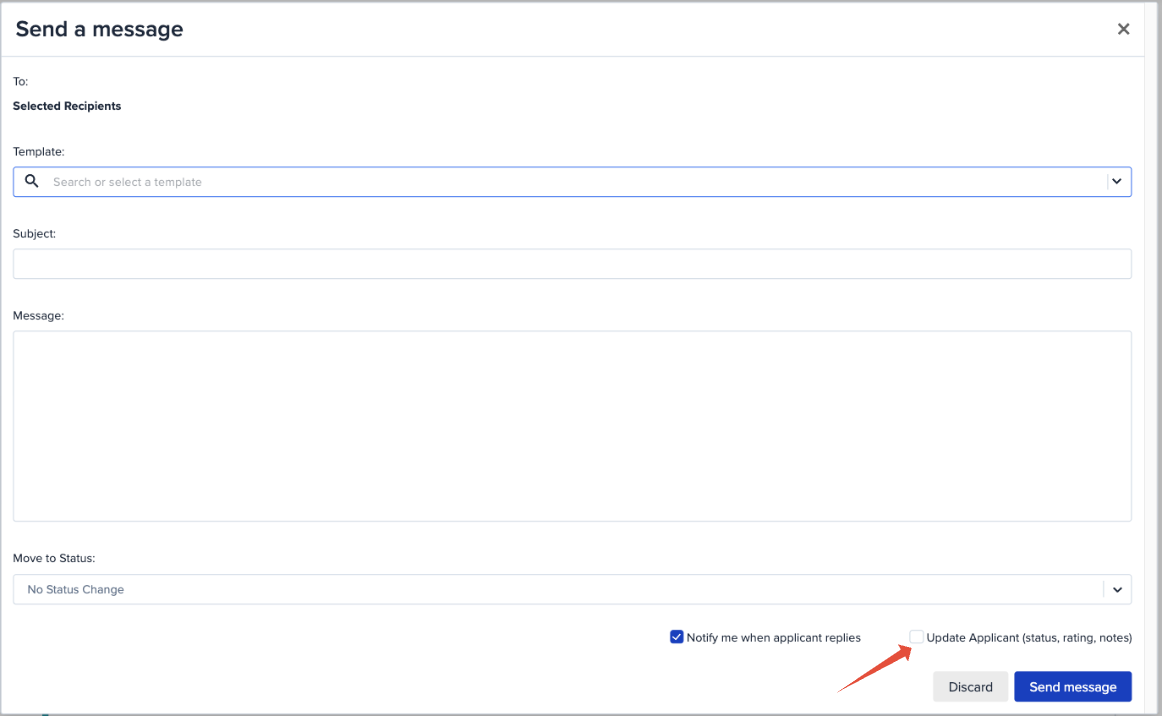
- Checking "Update Applicant (status, rating, notes)" will lead you to a second step, where you can make those changes.
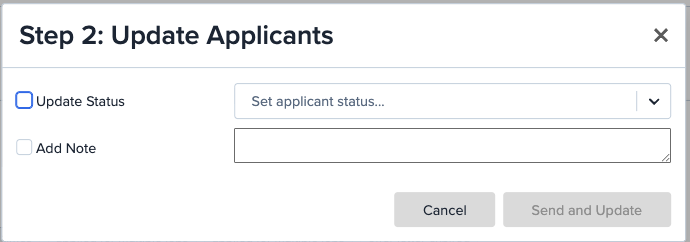
If You Select: Send "Thanks but No Thanks"
- This option works similarly to Send a Message. A pop-up window will appear, but it will preload your "Thanks but No Thanks" template. You can still select an alternative template if you have more than one TBNT in your account:
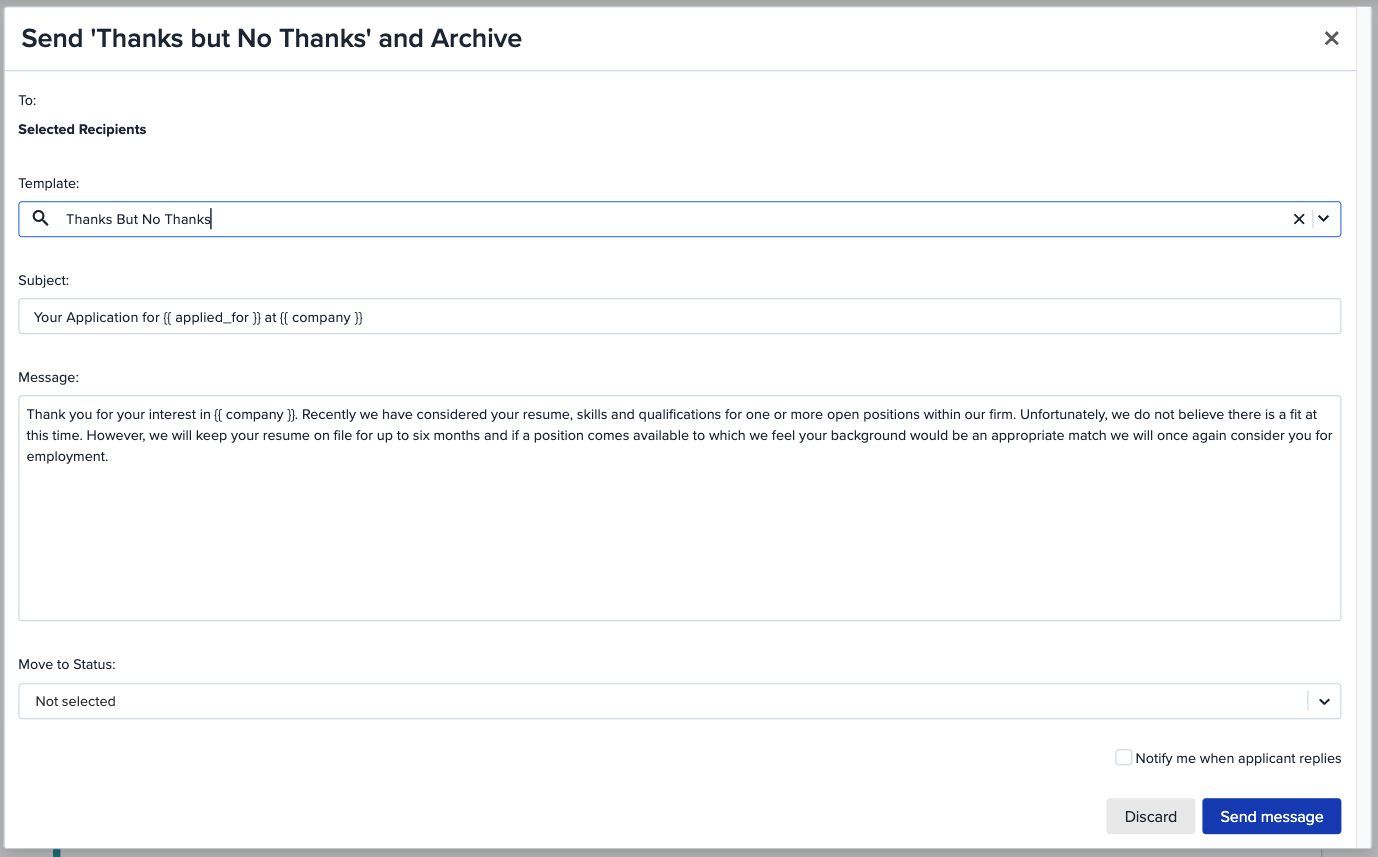
- You can also bulk select a Status for all of these applicants
- Check the box for "Notify me when applicant replies" if you want to make sure you don't miss any replies. By default, this is deselected
- Click Send message when you're happy with your message and your Status has been selected.
If You Select: Update Applicants
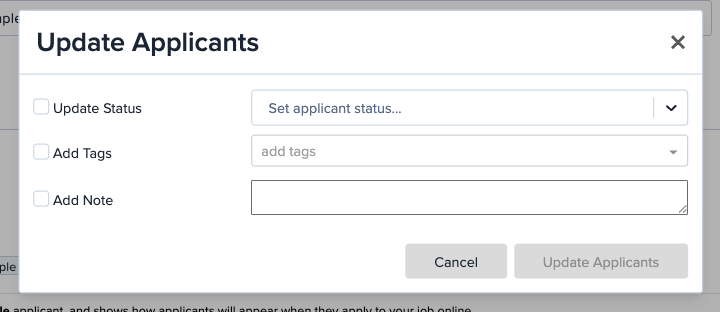
- In the Update Applicants window, choose what you want to do:
- Change applicant status
- Add or remove tags
- Add an internal note
- Click "Update Applicants" to apply your changes.
And that's it — bulk updates made simple and efficient. If you hit any snags, need to manage more than 500 applicants, or just want a hand fine-tuning your filters, our friendly support team is always happy to help. Reach out any time.